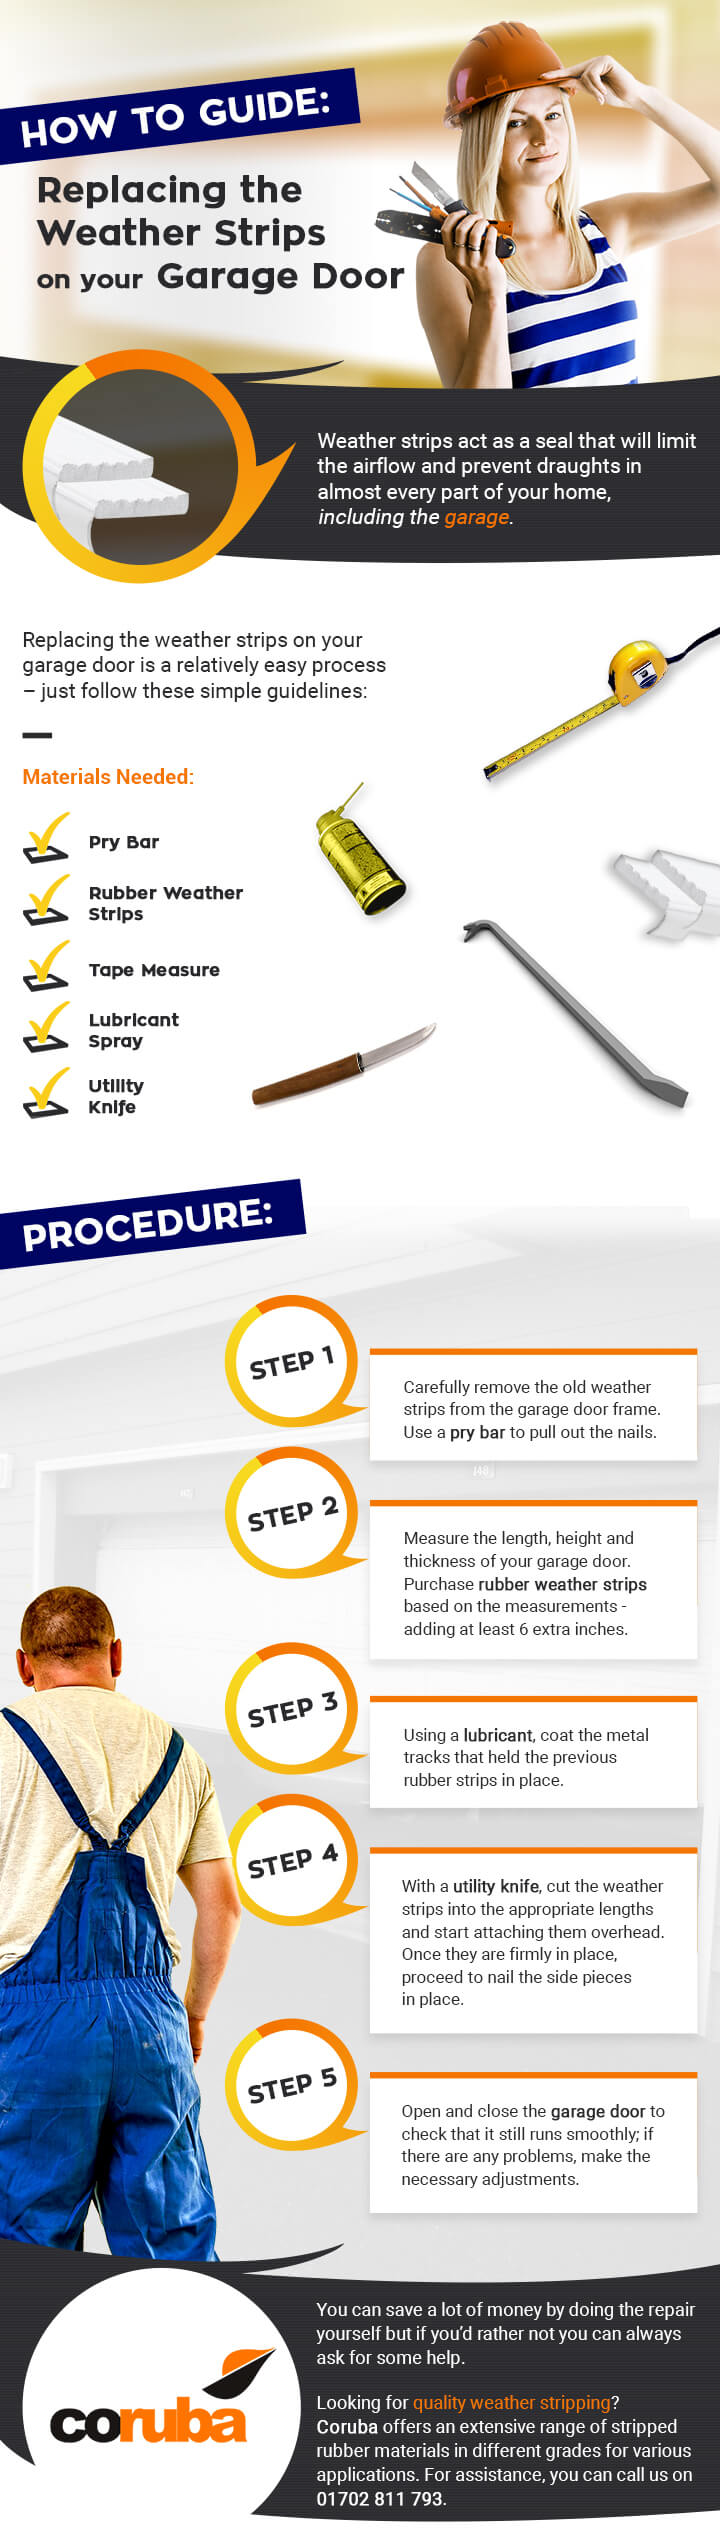
Weather strips act as a seal that will limit the airflow and prevent draughts in almost every part of your home, including the garage.
Replacing the weather strips on your garage door is a relatively easy process – just follow these simple guidelines:
Materials Needed:
- Pry Bar
- Rubber Weather Strips
- Tape Measure
- Lubricant Spray
- Utility Knife
Procedure:
STEP 1: Carefully remove the old weather strips from the garage door frame. Use a pry bar to pull out the nails.
STEP 2: Measure the length, height and thickness of your garage door. Purchase rubber weather strips based on the measurements – adding at least 6 extra inches.
STEP 3: Using a lubricant, coat the metal tracks that held the previous rubber strips in place.
STEP 4: With a utility knife, cut the weather strips into the appropriate lengths and start attaching them overhead. Once they are firmly in place, proceed to nail the side pieces in place.
STEP 5: Open and close the garage door to check that it still runs smoothly; if there are any problems, make the necessary adjustments.
You can save a lot of money by doing the repair yourself but if you’d rather not you can always ask for some help.
Looking for quality weather stripping? Coruba offers an extensive range of stripped rubber materials in different grades for various applications. For assistance, you can call us on 01702 560194.